
Introduction to WaveLight® Infinity SEG Lightbox Assembly
Assembling a WaveLight® Infinity SEG Lightbox becomes straightforward when you clearly understand the components, the recommended sequence, and the best practices that guide the process from start to finish. These units are designed as edge-lit fabric display systems, combining precision aluminum frames with powerful LEDs and tensioned fabric graphics to achieve a sleek, modern presentation. Because the system is modular and often pre-labeled, even first-time users can usually complete assembly in a short period without specialized training or advanced tools. Many distributors note that standard sizes can be assembled in roughly 30–45 minutes by a two-person team, while compact configurations can often be built in less than 20 minutes. The key to efficient setup is careful preparation, which includes laying out all parts, reviewing the instructions, and verifying that you have everything required before beginning. When you follow a methodical process, each step—from frame assembly to graphic installation—naturally builds upon the previous one, reducing the likelihood of errors or rework. As a result, WaveLight® Infinity systems are frequently chosen for illuminated display solutions where speed, consistency, and professional appearance are critical. In the sections that follow, you will find a structured, step-by-step approach to help you assemble, test, and maintain your SEG lightbox with confidence and repeatability.
A typical WaveLight® Infinity SEG Lightbox kit includes several precisely engineered components that work together to create a durable and refined display. You will find aluminum profiles that form the outer frame, along with corner connectors that lock the sides together at accurate angles so the finished structure remains square and stable over time. Many configurations also include internal support bars that run horizontally or vertically within the frame, preventing bowing and supporting the LED arrays for even light distribution. Depending on the specific model, the LED system may consist of rigid light bars, flexible strips, or integrated modules that clip or slide into dedicated channels along the frame. Power supplies and interconnecting cables are also provided, typically supporting universal input voltage so the same system can be used across multiple regions. The heart of the presentation is the printed fabric graphic with silicone edging, which stretches tightly across the frame to create clean, frameless lines and vivid SEG backlit fabric graphics. Some kits additionally include base plates or feet for freestanding installations, or brackets and hanging hardware for wall-mounted and ceiling-suspended configurations. By reviewing each of these parts before starting assembly, you reduce surprises later and gain a clear understanding of how the pieces interact to form a cohesive and reliable illuminated display.
Before you begin building the frame, it is essential to select and prepare a suitable workspace that can accommodate the full footprint of your assembled lightbox. Choose a flat, clean surface large enough for you to lay out each frame segment end-to-end without overlap, and avoid rough or dirty floors that might scratch aluminum or stain the fabric graphics. Carefully open cartons or shipping cases, taking care when using box cutters around protective bags and printed materials so you do not accidentally slice the fabric. As you unpack, arrange all components so that similar pieces are grouped together, and place small hardware such as screws, brackets, and connectors in containers or trays where they will not be misplaced. It is good practice to check the contents against the packing list or assembly diagram provided by the manufacturer, confirming that no profiles, power supplies, or cables are missing or damaged. Many users keep the cardboard and foam packaging available during assembly, using it as a temporary padded surface underneath the frame to prevent scuffs. This preparation phase is also the right moment to review the steps in the instruction manual so that you understand the recommended order of operations. Investing a few extra minutes in organizing your workspace will streamline every stage of the build and minimize interruptions once you start assembling the frame and connecting electrical components.
Once your workspace is prepared, begin by identifying and organizing all frame profiles, paying close attention to any stickers, engraving, or color marks that indicate their position and orientation. Lay the horizontal sections in one group and the vertical sections in another, and keep corner connectors and internal support bars near the ends where they will be installed. Many WaveLight® Infinity systems are built around modular SEG display frames that share common parts across different sizes, so the labeling becomes especially helpful when you manage multiple units or expand an existing configuration. As you review the profiles, take note of the channels that will receive the silicone bead of the fabric graphic and the tracks or mounting surfaces that will hold the LED modules. Confirm which side of each profile faces inward toward the LEDs and which side forms the external perimeter that will remain visible when the display is in use. Clarifying orientation at this stage prevents the frustration of having to partially disassemble and flip sections later. This is also a good time to identify any special connection points for support bars or accessories such as feet, stabilizers, or joining elements used to link multiple frames. With a well-organized set of parts, you are ready to move forward with confidence to build the structural perimeter of your lightbox.
To assemble the primary frame structure, lay out the side rails and top and bottom rails on the floor in the approximate shape of the finished lightbox. Insert the corner brackets or connectors into the mating channels, following the manufacturer’s recommended order so that each corner locks securely into place as you go. When tightening screws or set bolts, use the supplied tools or appropriate hand tools, applying firm but controlled pressure to avoid stripping threads or deforming the aluminum. After all four sides are connected, use a tape measure to compare the diagonals from corner to corner; if both measurements match, your frame is square, which will help the SEG fabric seat evenly later. At this point you may also install any intermediate connectors that join multiple frames if you are building portable backlit SEG walls or larger multi-panel arrangements. It is good practice to recheck each connection to ensure it is fully tightened and aligned, as even small misalignments can become more visible once the fabric is tensioned. Keeping the frame flat while you work will make it simpler to add support bars and LED assemblies in the correct locations. A well-aligned frame not only improves the visual quality of the finished display but also extends the life of the graphics and hardware by distributing tension and loads more evenly.
With the outer perimeter completed and squared, you can proceed to install the internal support bars and LED light engines according to the assembly diagram. These bars typically span the shorter dimension of the frame and are essential for maintaining rigidity, especially on larger units where the span could otherwise flex or bow. Depending on your model, the LED system might consist of linear bars that fasten directly to the support structures or flexible strips that adhere to dedicated channels inside the profiles. Ensure that each LED component is oriented correctly so that the light is directed toward the interior of the frame, where the diffusion and fabric will create the final illuminated effect. Many systems are designed to function as energy-efficient LED lightbox frames, providing bright, uniform illumination while minimizing power consumption and heat output. As you install the LEDs, route the wiring along the frame in a tidy manner, securing cables with clips or ties to prevent strain on connectors and to keep conductors away from moving parts. Avoid sharply bending or twisting the LED strips and cables, as this can damage internal circuitry or lead to intermittent connections over time. By taking care with spacing, attachment, and cable management, you lay the foundation for consistent lighting quality and long-term reliability of the display.
The next stage is to connect the LED arrays to their power supplies and verify that the lighting system operates correctly before installing any fabric graphics. Begin by identifying the low-voltage leads coming from each LED bar or strip, then plug them into the designated ports or junction boxes specified in the manual. Route these cables neatly along the inner channels of the frame or behind support bars, securing them where necessary to keep the layout organized and free from pinch points. Connect the main power supply or supplies to the junction cables, ensuring that polarity and connector orientation match the manufacturer’s instructions. Many modern systems support custom illuminated SEG signage in diverse venues, so the power supplies are often rated for 100–240V AC input, allowing you to operate them in different countries with the appropriate cords or adapters. Once all connections are in place, plug the power supply into a suitable outlet and briefly switch on the system to test the LEDs. Confirm that all sections illuminate evenly without flicker, dim patches, or dead zones, and then power off the unit to correct any issues if they appear. Testing at this stage saves time, because it is far easier to troubleshoot wiring and replace components before the fabric graphics are installed and tensioned across the frame.
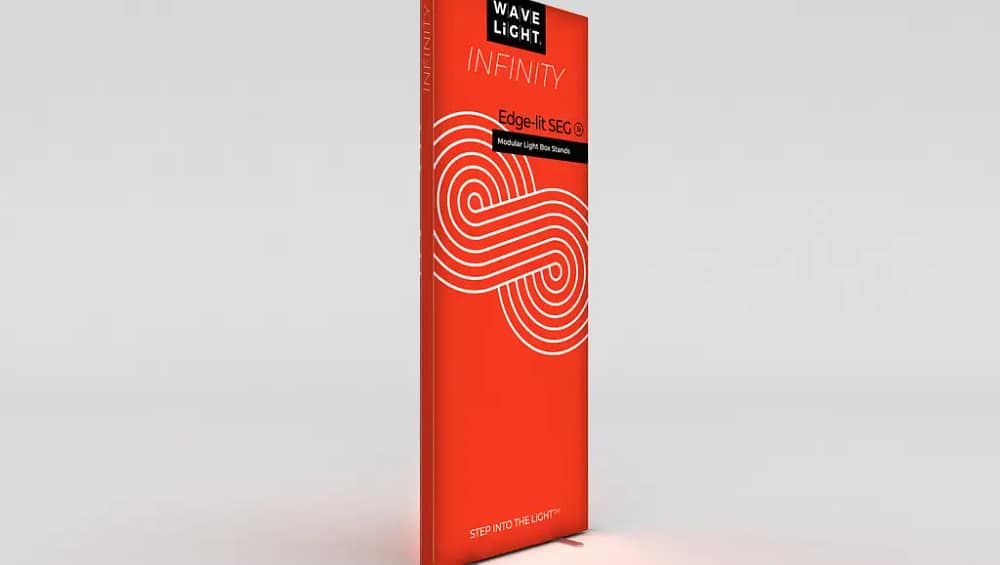
After confirming that the lighting functions correctly, you are ready to install the front fabric graphic with its silicone edge gasket. Lay the graphic face-up over the frame so that it is centered and correctly oriented, taking a moment to verify that logos, images, and text align with the intended top and bottom. Begin inserting the silicone bead into the channel at the center of one side of the frame, pressing it gently into place with your thumbs rather than forcing or stretching the material excessively. Move to the opposite side and insert the center portion there, then repeat for the remaining two sides, working from the middle outward toward the corners in a balanced pattern. This “center-out” technique helps distribute tension evenly and reduces the likelihood of wrinkles or distortions in the printed image. Once the midpoints are secured, continue seating the silicone edge in small increments along each side, alternating sides periodically to keep the tension uniform. Finish by carefully tucking the corners, which may require a bit of additional manipulation to ensure they sit flush and smooth within the frame. The goal is to achieve a taut, flat surface that showcases the quality of the print and the vivid illumination provided by the integrated LEDs. Proper installation at this stage directly contributes to the refined look associated with premium illuminated fabric displays in professional environments.
If your WaveLight® Infinity configuration is double-sided, you will also install a rear graphic or a neutral backer using a process nearly identical to the front installation. Many users choose coordinating artwork on both sides to create trade show fabric lightboxes that are visible from multiple aisles or vantage points within an event space. Others prefer a fully branded front side and a white or softly colored diffusion backer on the rear to enhance light balance and minimize visual distractions from behind. As with the front graphic, orient the rear panel carefully, begin inserting the silicone bead at the centers of each side, and proceed gradually toward the corners while maintaining even tension. Ensure that any seams or pattern edges line up neatly with the frame so the overall display remains visually coherent from both directions. Once both sides are in place, inspect the graphics for ripples or loose sections, and gently adjust the silicon edging where needed to refine the fit. Well-installed fabric on both faces not only improves aesthetics but also helps protect the internal LEDs and wiring from dust and light physical contact. Taking a few extra moments to confirm alignment and tension on each side will deliver a professional result that stands up to close inspection in high-visibility settings.
With the graphics installed, you can move on to mounting and final positioning, which will depend on whether your lightbox is freestanding, wall-mounted, or suspended. For freestanding configurations, attach the steel base plates or feet as specified by the manufacturer, using all provided fasteners and tightening them securely so the structure remains stable when upright. If you plan to join multiple units together to create portable backlit SEG walls, follow the recommended procedure to link the frames, install any stabilizing elements, and align the graphics across seams for a continuous visual presentation. Wall-mounted and ceiling-suspended installations require appropriate anchors or hardware rated for the load and matched to the substrate, whether you are working with drywall, concrete, wood, or other materials. Always reference local building codes and any venue regulations, especially in trade show halls, where safety requirements and maximum heights are often strictly defined. Once the lightbox is in its final location, connect the power supply to a suitable electrical circuit and perform a last check to confirm that all LEDs illuminate properly and that the graphics remain evenly tensioned. A carefully executed mounting process supports long-term safety, durability, and visual impact, ensuring that your investment delivers consistent performance over repeated installations.
Ongoing troubleshooting and maintenance are integral to preserving the visual quality and operational reliability of your WaveLight® Infinity system. If you notice dim areas, flicker, or segments that fail to light, begin by checking all cable connections to confirm that they are fully seated and free from visible damage. Verify that the power supplies are functioning and properly matched to the voltage available at your location, and inspect the LEDs and wiring for signs of wear or stress, particularly around bends and junctions. If the fabric graphic shows wrinkles or uneven tension, avoid pulling aggressively on the center; instead, remove and reinsert the silicone edging along the affected sections, working gradually to smooth out the surface. Many fabrics used in fabric lightbox signage are designed to be machine-washable on gentle cycles, and light steaming from the front side with low heat can help remove persistent creases without harming the print. When packing for transport or storage, roll or loosely fold the graphics, storing them in clean, dry bags to prevent stains, hard creases, or surface abrasions. Periodically wipe down the aluminum frame with a soft, non-abrasive cloth to remove dust and maintain the appearance of the profiles. Consistent attention to these details will ensure that your investment in custom SEG lightboxes continues to perform at a high level and project a polished brand image at every deployment.
WaveLight® Infinity SEG Lightboxes are widely regarded as a compelling choice for organizations seeking versatile, professional, and easily deployable illuminated displays. Their modular construction and labeled components simplify both initial installation and repeated setups across different venues, making them well suited for marketing teams, event agencies, and retailers who frequently refresh their environments. Because the system is based on interchangeable frames, graphics, and LED modules, it can scale from small single-panel presentations to extensive edge-lit fabric display systems without requiring entirely new infrastructure. Many users appreciate the balance between visual impact and operational efficiency, as the bright, evenly diffused illumination elevates branding while the tool-minimal assembly process keeps labor demands manageable. In environments where quick turnaround is essential, such as exhibitions or seasonal retail campaigns, these systems provide the flexibility to update messaging simply by swapping SEG backlit fabric graphics while retaining the existing frames and lighting. The combination of energy-efficient LED lightbox frames and durable fabric prints also supports long-term cost control, as power consumption and replacement intervals are both reduced compared to older technologies. For organizations striving to present a modern and consistent visual identity, the ability to reconfigure and reuse frames, update artwork rapidly, and transport relatively lightweight hardware offers a significant strategic advantage. When implemented thoughtfully, WaveLight® Infinity solutions can form the core of a cohesive program of premium illuminated fabric displays across stores, events, corporate environments, and promotional campaigns.


