
Understanding Infinity DNA™ Pro Lightboxes for Trade Shows
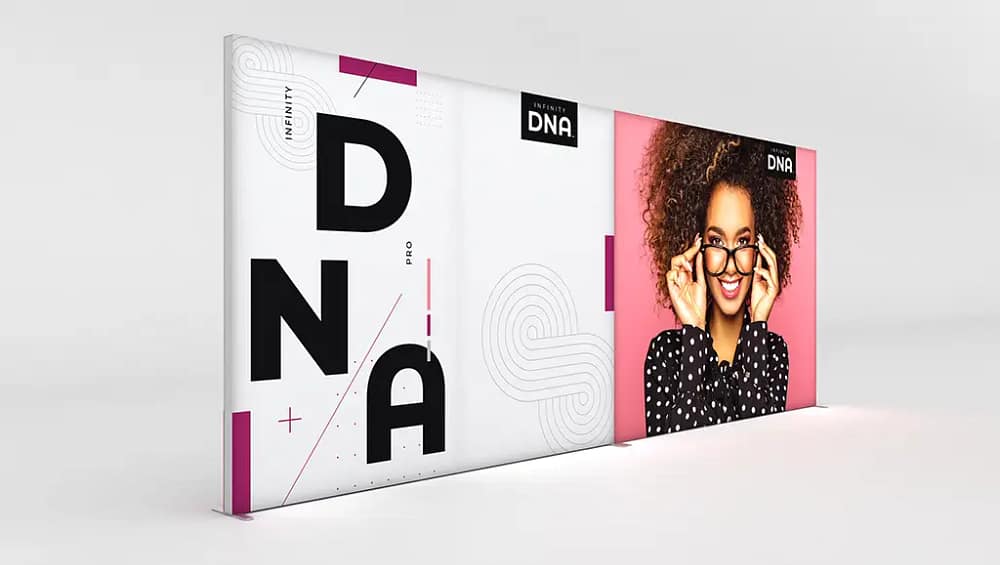
Infinity DNA™ Pro lightboxes are advanced SEG fabric display systems designed to deliver bright, uniform illumination and clean, frameless visuals for professional trade show environments. These systems use silicone edge graphics that tuck neatly into the frame, creating a seamless appearance that draws attention without visible hardware distractions. Built specifically for exhibitors who value efficiency and branding impact, they are engineered to be durable enough for frequent use while still packing down for easy transport. Their construction is based on lightweight aluminium display frames that balance strength with portability, making them ideal for busy trade show schedules and frequent reconfigurations. When properly assembled, Infinity DNA™ Pro units function as modular trade show lightboxes that can stand alone or be combined to form larger backwalls and immersive environments. The internal LED display technology is typically engineered to minimize hotspots, offering consistent brightness for vibrant graphics under typical exhibition hall lighting. These systems are also designed to integrate cleanly with accessories like connectors, feet, and power management components, supporting a professional and organized booth appearance. Understanding how these elements work together is the first step to assembling reliable, reusable illuminated backwalls that enhance your overall event strategy.
Tools and Components Checklist Before You Begin
Before assembly, it is essential to verify that you have all the components and tools required for a smooth build of your Infinity DNA™ Pro system. Begin by laying out all frame sections, corner connectors, base plates or stabilizing feet, and any joining brackets used when connecting multiple frames. Confirm that your SEG fabric graphics are labeled correctly for front and back, and that the silicone edges are intact with no tears, stretching, or visible damage that could affect tension. Inspect the integrated or separate LED strips, including power supplies, jumper cables, and any in-line connectors, ensuring that no pins are bent and that cables are free of cuts or kinks. Many systems are engineered as a tool-free exhibition lightbox solution, but you may still want basic items on hand such as a soft cloth, a small rubber mallet, and a pair of gloves to protect graphics from skin oils or dirt. Check that printed instructions or manufacturer diagrams are accessible and that you have adequate floor space to lay the frame sections flat without crowding. For safety, identify where power strips, surge protectors, and extension cords will be placed, and confirm that all electrical items meet venue and regional standards. Take a moment to compare your packing list or order confirmation with the contents in your cases, so you can address any missing parts before you are on a tight schedule. A careful pre-assembly checklist reduces stress on the trade show floor and protects your investment in premium LED light frames.
Step-by-Step Assembly: From Unpacking to a Finished Lightbox
Start the assembly process by unpacking all components carefully and placing protective material on the floor to prevent scratching the frame or soiling the fabric graphics. Arrange the frame profiles according to the labeled numbers or letters, matching corners to corners and verticals to horizontals in the layout recommended by the manufacturer. Connect each frame piece using the supplied corner brackets or internal connectors, firmly pressing or locking them into place until you feel or hear the mechanism engage. If your system is part of a series of portable LED booth displays, use the designated connectors or spanners to join adjacent frames, ensuring they are square and aligned before tightening or locking. Once the frame is fully assembled and standing, attach the stabilizing feet or base plates, checking that all locking knobs or screws are secure and that the structure does not wobble. Next, install the LED components following the provided wiring path, making sure all cables run cleanly along the frame and that connectors click firmly together with correct polarity. After confirming that the lights power on and that there are no flickers or dark sections, switch them off and begin installing the SEG graphics by inserting the silicone edges into the frame channel, starting at the corners and working toward the center of each side. Gently smooth the fabric as you go to avoid wrinkles, and finish by inspecting both front and back for even tension so your Infinity DNA™ Pro lightbox presents a clean, professional appearance from every angle.
Electrical and Safety Considerations on the Trade Show Floor
Electrical safety is a critical part of assembling and operating Infinity DNA™ Pro lightboxes in busy trade show environments. Always verify that your power supplies and extension cords are rated for the local voltage and that they include proper grounding as specified by the venue. Position power strips and adapters behind the structure or under counters where they will not be stepped on or exposed to potential spills, and avoid daisy-chaining multiple surge protectors. When working with LED display technology, ensure that all low-voltage connectors are fully inserted, free of damage, and never forced into place, as bent pins can cause shorts or intermittent failures. Keep power cables neatly bundled with clips or Velcro straps and route them away from main walkways to prevent tripping hazards for staff and visitors. Before the show opens, ask the venue’s technical team about any specific fire code rules or inspection procedures related to illuminated displays and follow their guidance precisely. Conduct a quick functionality test at the start of each day, checking that all segments of your modular retail lightbox displays are lighting consistently and that power supplies are not overheating. If you detect unusual smells, flickering lights, or warm components, disconnect power immediately and inspect or replace the affected parts. Taking these precautions helps you maintain consistent performance and ensures that your illuminated booth complies with safety standards throughout the event.
Common Assembly Mistakes and How to Avoid Them
Many assembly issues arise from rushing the setup process or ignoring the sequence recommended by the manufacturer. One frequent mistake is forcing frame connectors that are slightly misaligned, which can cause damage to the locking mechanism or result in an out-of-square structure that affects how the SEG fabric fits. Another problem is installing graphics before confirming that all LED elements work properly, leading to time-consuming removal and reinstallation if a connection is loose. Exhibitors also sometimes mix up front and back graphics, especially when using multiple custom lightbox solutions within the same booth that feature similar artwork or color schemes. Overstretching the silicone edge graphics, pulling excessively at corners or edges, can damage the stitching and reduce the fabric’s ability to hold tension over repeated uses. Failing to tighten or fully secure base plates can create subtle instability that becomes more noticeable once visitors start interacting with the display. Some teams neglect to inspect the frame for dust, fingerprints, or adhesive residue before installing fabrics, which can show through on lighter designs under bright LEDs. To avoid these issues, follow a simple checklist that includes frame verification, electrical testing, careful graphic orientation, and final stability checks before the show floor opens. A deliberate, methodical approach will greatly reduce errors and protect both your equipment and your brand presentation.
Maximizing Impact: Positioning, Branding, and Maintenance Tips
To get the best return on your Infinity DNA™ Pro investment, think strategically about positioning and branding long before you arrive at the venue. Place the lightboxes where they can draw visitors in from key sightlines, such as main aisles, entrances, or near complementary portable advertising banners that reinforce your message. Use bold, high-contrast artwork and concise messaging that can be understood at a distance, taking full advantage of the bright illumination that premium LED light frames provide. When designing graphics, remember that SEG fabric display systems excel at delivering large, continuous visuals, so prioritize strong hero imagery and minimize clutter around the edges. Because these structures function as reusable illuminated backwalls, plan your design library so that you can swap seasonal or campaign-specific fabrics while keeping the same frames, reducing long-term costs. For maximum flexibility, consider configurations that allow some units to stand alone as a tool-free exhibition lightbox when you need smaller footprints or satellite displays in future events. During the show, keep the surfaces clean by gently wiping frames and checking fabrics daily for loose corners, dust, or smudges that could distract from the overall look. After each event, pack graphics in clean, dry protective bags and store frames in their designated cases to prevent scratches and deformation. With consistent care, thoughtful placement, and strategic graphic planning, your Infinity DNA™ Pro lightboxes will remain a versatile cornerstone of your portable LED booth displays for many trade shows to come.
Key point 1: Carefully verify all components and tools before assembly to prevent delays and ensure structural integrity on site.
Key point 2: Follow a clear, step-by-step sequence when assembling frames, installing LEDs, and inserting SEG fabric to achieve a crisp, professional finish.
Key point 3: Prioritize electrical safety, including correct voltage, grounded connections, and organized cable routing, for reliable and compliant operation.
Key point 4: Avoid common mistakes such as forcing misaligned parts, skipping light tests, and over-stretching graphics, as these can damage your system and reduce visual quality.
Key point 5: Maximize the long-term value of your Infinity DNA™ Pro system by optimizing booth placement, planning versatile graphics, and performing consistent maintenance after every event.


