
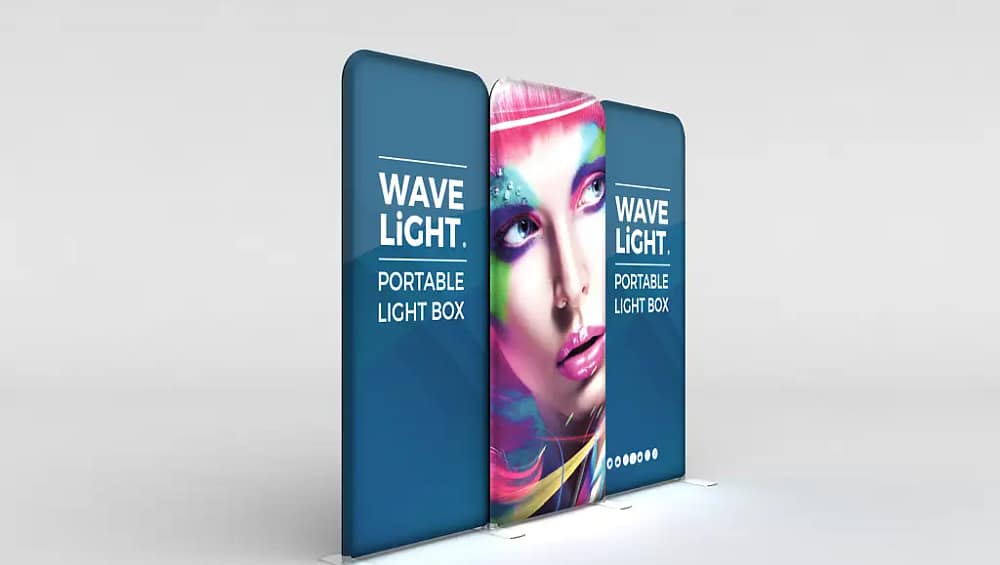
Exhibiting at trade shows across Australia can be exciting, but the setup process often brings unnecessary stress. Tight schedules, limited manpower, and complex booth systems can slow you down before the event even begins. That is why Backlit Expo Kits (3m) are becoming a preferred choice for exhibitors who value speed, simplicity, and professional presentation.
What Makes Backlit Expo Kits (3m) Fast to Assemble
The quick assembly process is not accidental. These kits are designed with efficiency in mind, ensuring every component works seamlessly together.
Here is what makes them fast:
- Lightweight aluminium frames that are easy to handle
- Push-fit connections that eliminate the need for tools
- Pre-installed or simplified LED lighting systems
- Stretch fabric graphics that attach in seconds
This streamlined design ensures you can set up your booth quickly, even during busy bump-in periods at venues like ICC Sydney or Brisbane Convention and Exhibition Centre.
Step 1: Organise and Prepare Your Components
Before you begin, lay out all parts of your Backlit Expo Kits (3m). This helps you familiarise yourself with the structure and ensures nothing is missing.
- Identify frame sections and connectors
- Locate LED components and cables
- Unpack the fabric graphics carefully
Having everything ready at the start speeds up the entire process.
Step 2: Build the Frame Structure
The frame is the foundation of your display. Start by connecting the aluminium tubes.
- Match labelled or corresponding sections
- Push the pieces together until they click securely
- Form the full 3m frame layout
Because the system is modular, the frame comes together quickly and maintains excellent stability once assembled.
Step 3: Attach the LED Backlighting
Next, install the LED lighting that gives the display its signature glow.
- Secure LED strips along the frame
- Follow simple connection points for wiring
- Ensure even placement for consistent lighting
This step transforms your structure into a high-impact display that stands out in crowded exhibition halls.
Step 4: Fit the Tension Fabric Graphics
Now it is time to bring your branding to life. The fabric graphics are designed for quick application.
- Align the graphic with the frame edges
- Use silicone edging or zip systems to secure it
- Smooth the fabric for a wrinkle-free finish
The backlit effect enhances colours and sharpness, making your message more visible to attendees.
Step 5: Power Up and Test the Display
Once everything is assembled, connect your system to power.
- Plug into a standard outlet provided by the venue
- Turn on the LED lights
- Check for even brightness and alignment
A quick test ensures your booth is ready before the event opens.
Designed for Australian Exhibition Environments
Trade shows in Australia often require fast setup and teardown. Backlit Expo Kits (3m) are built to meet these demands.
You can expect:
- Efficient setup within tight timeframes
- Easy transport between cities like Sydney, Melbourne, and Brisbane
- Reduced labour requirements
- Reliable performance across multiple events
This makes them an excellent investment for businesses attending regular exhibitions.
Benefits Beyond Quick Assembly
While speed is a major advantage, Backlit Expo Kits (3m) offer much more.
- Eye-catching LED illumination that draws attention
- Reusable frames for long-term cost savings
- Lightweight design for easy shipping
- Professional finish that elevates your brand image
These features ensure you are not only saving time but also maximising your impact on the show floor.
Conclusion
Backlit Expo Kits (3m) make exhibition setup simple and efficient without sacrificing quality. With a quick assembly process and user-friendly design, you can build a professional booth in a fraction of the time compared to traditional systems. Whether you are new to trade shows or a seasoned exhibitor, choosing a fast and reliable display solution allows you to focus on what truly matters, connecting with your audience and making a lasting impression.


